CUDA Development with CLion

CLion from JetBrains provides very good support on CUDA development. This post will mainly talk about how to create a CUDA project in CLion in Windows and how to solve problem when using CUDA 11.2.

Prerequisites

Before creating CUDA project in CLion, please install the following softwares.

  • CUDA Toolkit 11.2 for Windows. Check this link.
  • Visual Studio 2019 Community. Check this link.

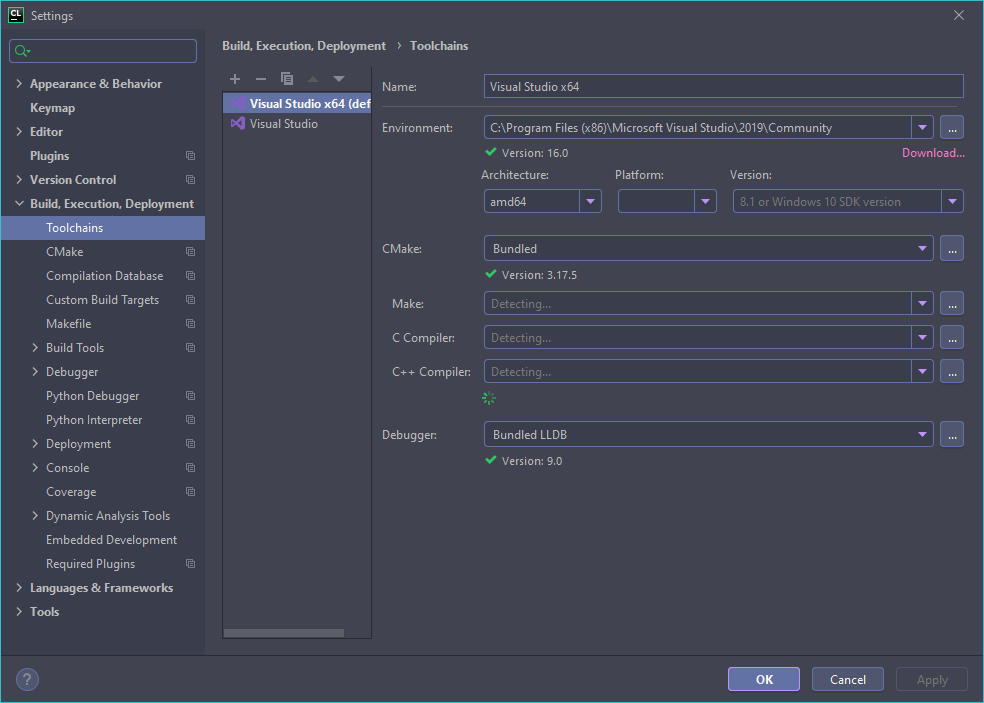
After installation, in CLion, make sure your Toolchain’s architecture is amd64.
Create CUDA Project In CLion

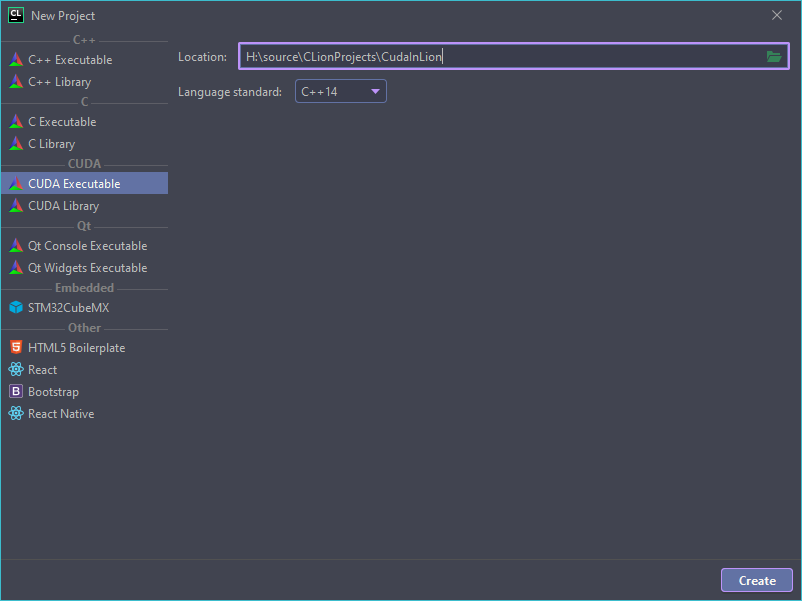
When creating new project in CLion, simply select “CUDA Executable” as the template.
Let’s modify the default main.cu and test if CUDA is working.

After build and run, you should see the following output.

Now CUDA is working in CLion project!

Trouble shooting

When having the issue related to vcvars64.bat…

At the beginning, I got the following issue

“Could not set up the environment for Microsoft Visual Studio using ‘C:/Program Files (x86)/Microsoft Visual Studio/2019/Community/VC/Tools/MSVC/14.26.28801/bin/HostX64/x64/../../../../../../../VC/Auxiliary/Build/vcvars64.bat’

After some searching, the problem is due to %PATH% is too long. You need to remove the unnecessary paths from %PATH%. Actually, if you see any double quote in %PATH%, please also remove them.

When having the issue “Use of undeclared identifier cudaConfigureCall

I also saw the following issue,

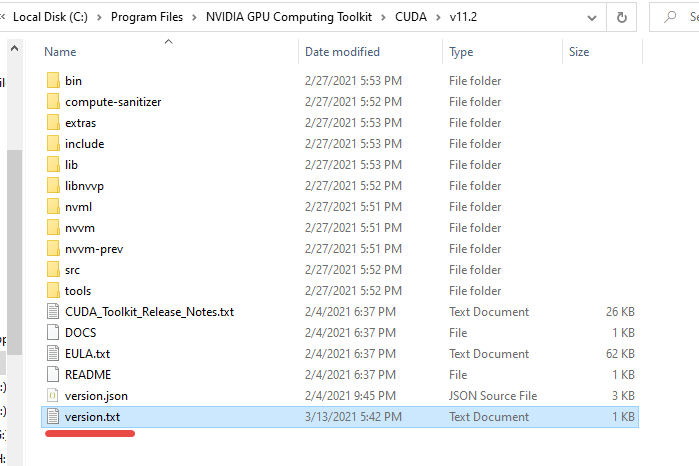
You probably are using CUDA 11. In this version, the version.txt file was removed. Instead, version.json was introduced. To solve this issue, you can simply create a version.txt with following context and copy it to where the CUDA is installed.

After opening the CLion, the problem will be gone.

References


Learn DC/OS with minidcos (4) – Use Marathon LB

In Part II, we deployed a service on the private node and in this part, let me talk about how to use marathon-lb to expose it onto the public node. For more details of Marathon and Marathon-LB, please check here.

Install Marathon-LB

With CLI, it’s easy to install marathon-lb, which is a package of DC/OS.

As you can see, the marathon-lb 1.15.0 is installed successfully. By default, it requires 2 CPU with 1GB memory. You can also adjust it from DC/OS GUI. In my testing, I need to remove “net.ipv4.tcp_max_orphans=60000” from Marathon-LB’s “Sysctl Params“. Otherwise, the service will be brought up.

You will find the marathon-lb service is up and it’s deployed on the public node.

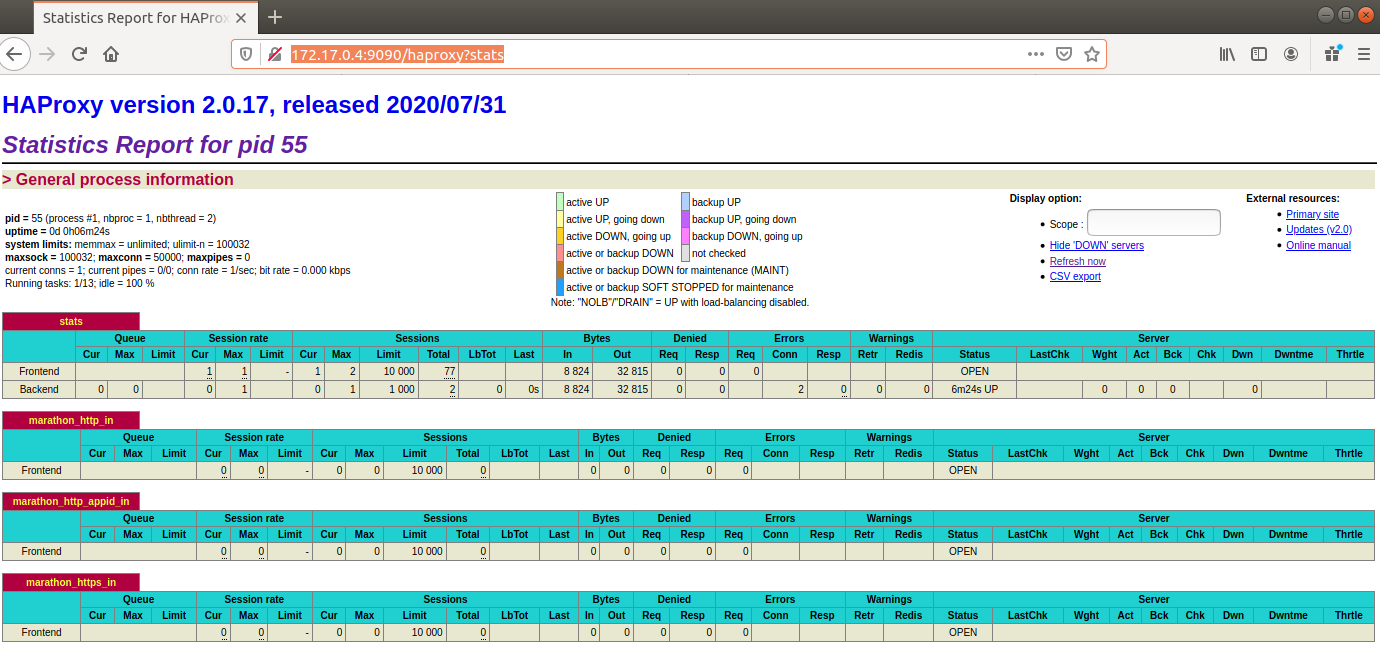
Since marathon-lb uses HAProxy as its backend, we can access the HAProxy statistic panel through http://172.17.0.4:9090/haproxy?stats.

Expose the Nginx Service with Marathon-LB

To expose the nginx service, we can simply add following label “HAPROXY_GROUP: external” tn the configuration.

After relaunching the nginx service, you can access the nginx from public node (172.17.0.4) on service port 10000, which the real service runs on the private node (172.17.0.3).

Reference

Learn DC/OS with minidcos (3) – Install and Use DC/OS CLI

After Part I and Part II, you have a workable DC/OS cluster and a nginx service is running. In this chapter, let’s talk about how to use DC/OS CLI, which is a helpful tool.

Installation

The DC/OS CLI’s version need to be the same as the DC/OS cluster runs. With minidcos, I installed the 1.12.5 so CLI’s version needs to be 1.12 as well. Use the following commands to download the CLI binary.

Then setup it

The DC/OS page will be open and log into to get the token. When token is typed in, your CLI is already attached to the running cluster. It’s ready to use it.

Commands

DC/OS CLI provides a lot of useful commands. With it, you can do the same as the GUI does. Here are some examples.

For more details, please use argument “-h” to check.

Let’s use CLI to run a service. I extracted the Nginx service configuration into the JSON file and the id was changed to “/nginx-service2”.

Then use “dcos marathon app add” to create a new service “/nginx-service2

From GUI, you can see the similar status.

All right. Now you know how to install CLI and some basic commands to check the status of cluster/node/services.

References

Learn DC/OS with minidcos (2) – Deploy the First Service

After reading Part I, you have a running DC/OS “cluster”, the dashboard UI ready for exploration. Now let’s talk about how to deploy service there. DC/OS management component runs on master nodes, so to-be-deployed services will run on agent nodes.

Agent Nodes – Public/Private Nodes

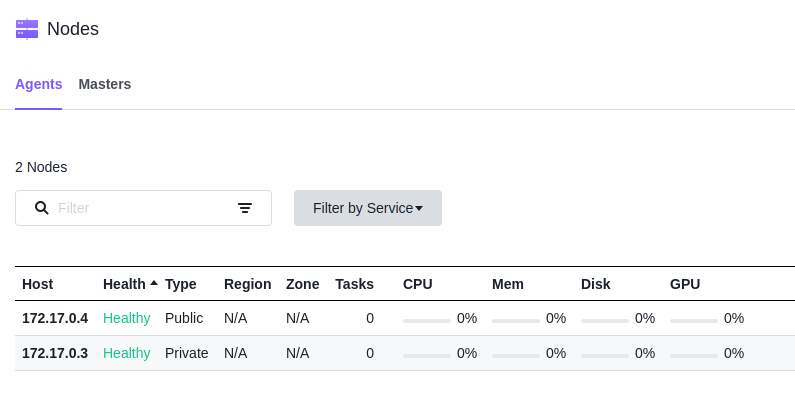
If you click “Nodes” on dashboard UI, you will see there are two agent nodes.

One is a private node, the other is an public one. A DC/OS agent node is a node on which user tasks are run. Agent nodes contain a few DC/OS components, including a Mesos agent process. Agent nodes can be public or private, depending on agent and network configuration.

  • A private agent node is an agent node that is on a network that does not allow access from outside of the cluster via the cluster’s infrastructure networking.
  • A public agent node is an agent node that is on a network that allows access from outside of the cluster via the cluster’s infrastructure networking.

More details about node types can be found here.

Deploy a Nginx Service with GUI

There two ways to deploy service – using GUI and using CLI. Let’s try GUI first and DC/OS CLI will be in later chapter.

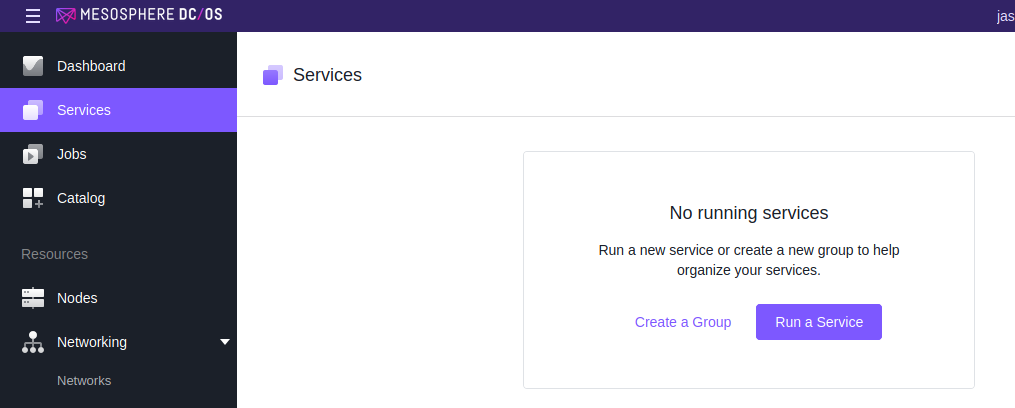
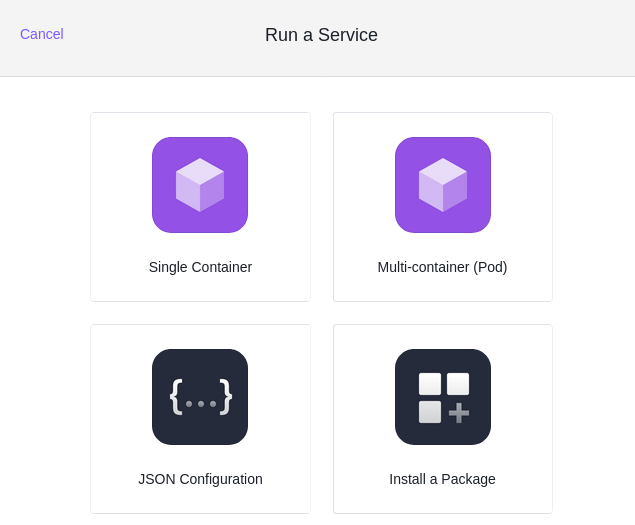
Click “Services” on navigation bar,  click “Run a service”, then click “Single Container”.

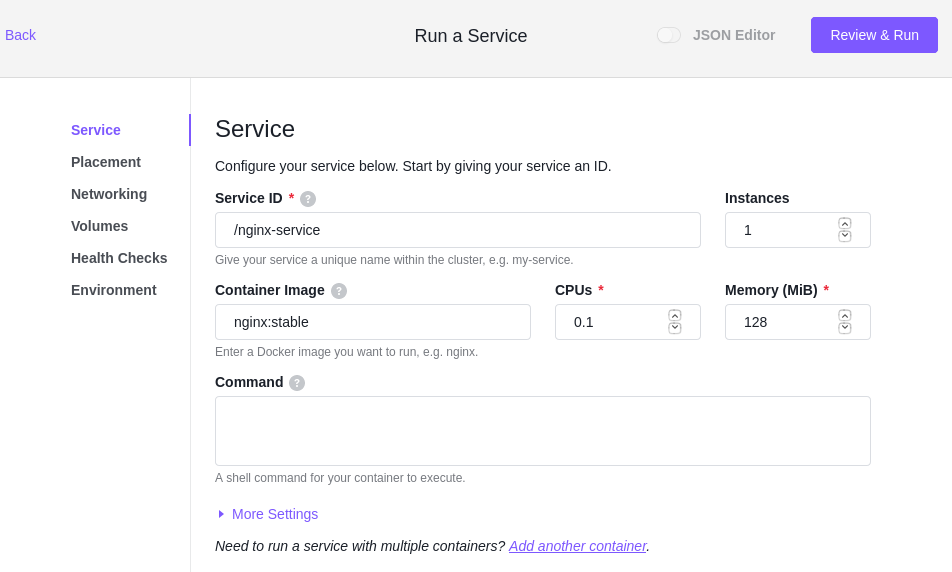
Now the container configuration UI shows up. Let’s do minimum configuration and bright up a nginx server.

On Service page

You need to define the service name, the container type (better to use “docker” with minidcos docker. With real cluster, you can use UCR), the image, how many instances, how much CPU/memory/GPU/disk and etc.

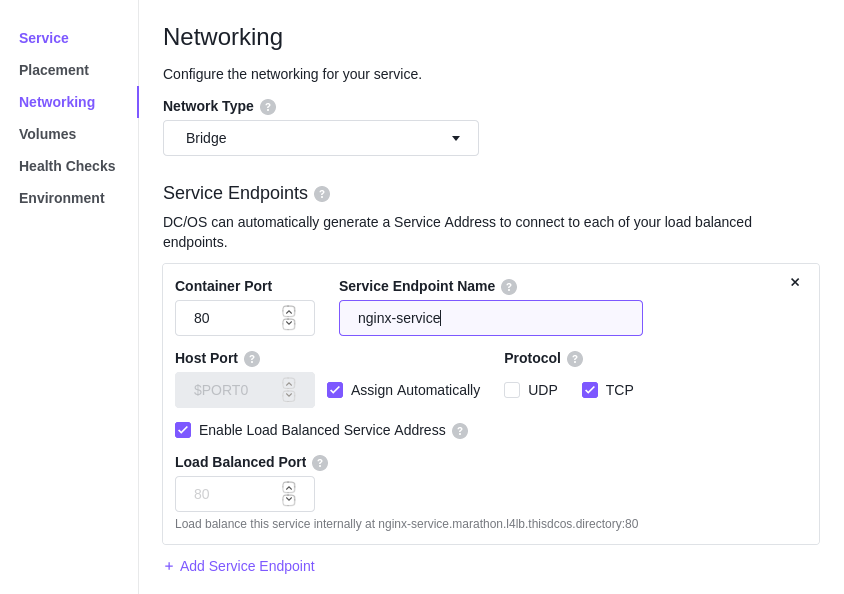
On Networking Page

Select “Bridge”, type the container’s port and service endpoint name (for service discovery), and enable the “Load Balanced Port” (Will talk about it in later chapters).

More details about DC/OS networking can be found here.

Other Pages

  • Placements – Specify more constraints and tell DC/OS (underlying, it’s Marathon) to deploy the service on which node.
  • Volumes – Specify a volume to mount to your service.
  • Health Checks – Specify endpoints for health checking. DC/OS will periodically check the health of services. Details are here.
  • Environment – Specify the environment variables (used by launching your services) or labels (expose more information to other services).

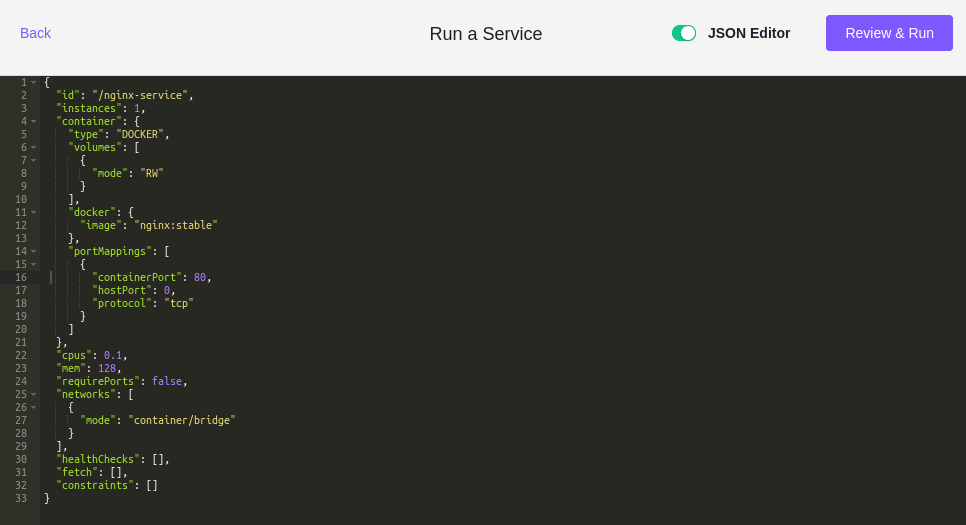
JSON Editor

You can enable JSON editor to review all the configuration in JSON format. The JSON file can also be used by DC/OS CLI, which allows us to version the configuration.

Run the service

After configuration, click “Review & Run“; After reviewing, click “Run service“. On “Services” panel, you will see the new service is being deployed and running.

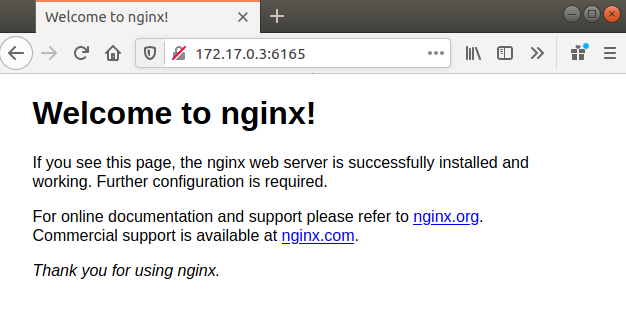
Now you will find the service runs on the private node (172.17.0.3) and the container’s 80 port was mapped to port 6165.

You can access this service through your browser.

Deploy the Service on Public Node

Deploying the service on private node is the default behavior. But if you want to expose the service on a public node, you need to add the following into the JSON configuration.

After updating the configuration and rerun the service, you will find the nginx service is running on the public node (172.17.0.4).

But usually, the private node will have much more CPU core and memory than public node. We can use load balancer, such as Marathon LB, Edge LB (Enterprise Edition) to expose the services on public nodes, meanwhile the services are running on private nodes. I will talk about it in the next chapter.

Great! Now you have the first service running on DC/OS!

References

Learn DC/OS with minidcos (1) – Installation and Initial DC/OS cluster Launch

As a distributed system, DC/OS is itself a distributed system, a cluster manager, a container platform, and an operating system. It includes a group of agent nodes with different responsibilities. To configure the whole system is not easy. Luckily, there is a tool named minidcos, which allow you to deploy “fake” agent nodes on the same machine, even a laptop.

This serial of articles aim to document all the details of install minidcos, configure the “fake” cluster and deploy services there.

Install minidcos

You can follow the instructions to install minidcos.

I did it on Ubuntu 18.04.5. First, install the missing software.

Install the minidcos through pip.

Note: here the official instruction has some mistakes. Use mine.

Next step is to install docker.

Need to restart/re-login to make sure your account is in docker group.

Use following command to test if minidcos and docker are installed correctly.

If there is any errors/warnings, you probably need to fix them.

minidcos supports different environments to manage the DC/OS cluster, such as AWS, Docker and Vagrant. Docker is the most familiar tool for me so I will use it in my rest explanation.

Download DC/OS installation package

Some blogs suggest you to use “dcos download-installer” to download the latest DC/OS installation package. But as I tried, minidcos doesn’t work well with the latest DC/OS version. So I suggest you to download DC/OS 1.12.5 by this link. (All versions can be found on this page.)  Because of it, you can’t try the latest features in newer DC/OS version at this moment.

Launch DC/OS Cluster

I downloaded DC/OS 1.12.5 (dcos_generate_config.sh) onto ~/dcos. It’s time to launch it. By the following command, the “fake” DC/OS cluster (named “default“) will be brought up.

Depends on how powerful your environment is, it may take some time to finish the deployment. Use following command to check.

If you want to find more logs, add “-vvvvv“. (P.S., That’s also how I found minidcos doesn’t support newer DC/OS version well.)

Open DC/OS Management Dashboard

When the cluster is launched, you can log into the management dashboard.

After this command, the dashboard page (http://172.17.0.2) should be opened in browser.

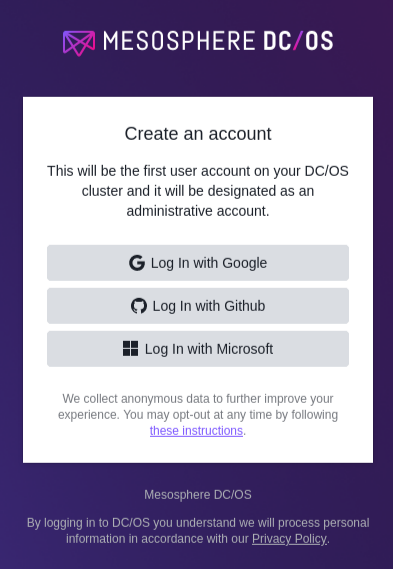
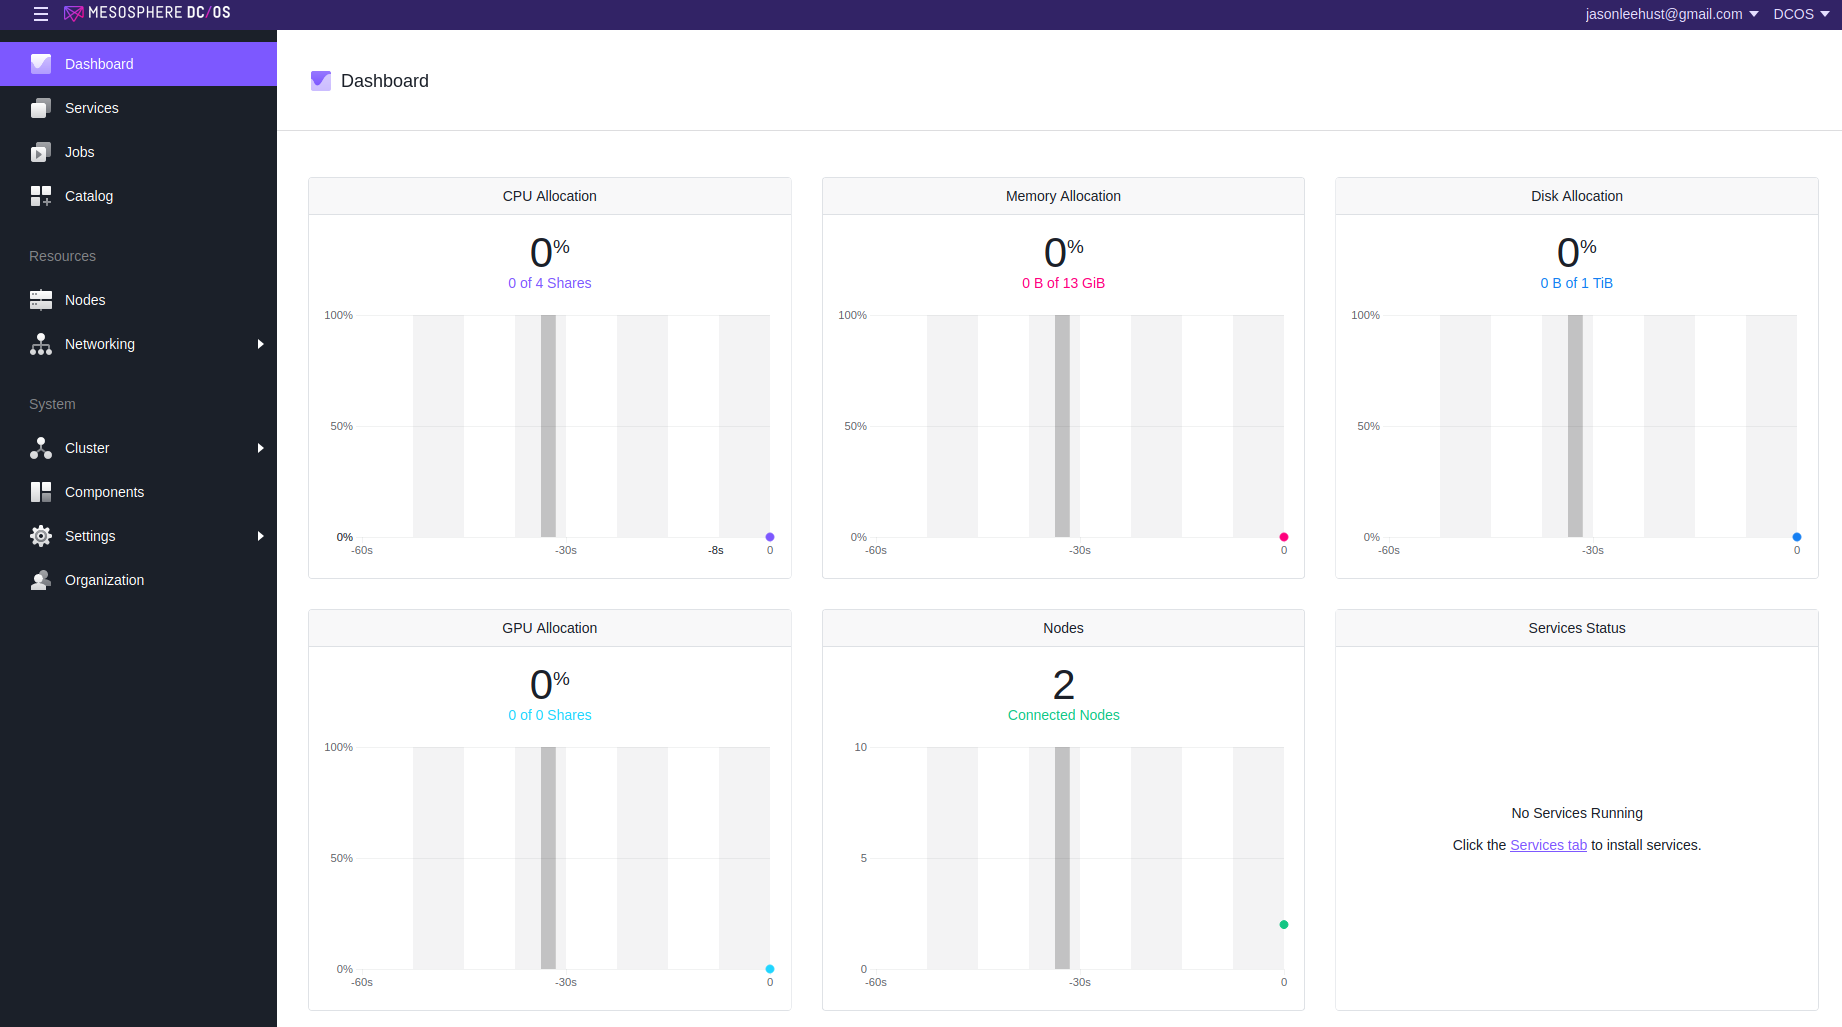
I chose “Log in with Google” and the dashboard will finally pop up.

The dashboard panel shows the usage of memory, CPU, disk, GPU, nodes and etc.

Something Under the Hood…

minidcos is using docker container to run the master/agent nodes.

There are three nodes running – master, public node and (private) node. Each of it runs Centos 7 image.

DC/OS software runs on these nodes.And in each node, there runs another docker environment. I believe it’s needed by later service deployment.

And another useful command is “minidcos docker inspect“. With it, you can find more details of the cluster, such as the cluster id, IP addresses of each node, containers and etc.

Conclusion

By far, the installation and initial launch is finished. Hope it’s helpful to you. And in next chapter, let’s run some services on this platform.


Docker Compose启动Apache Kafka+Zookeeper

这个YML文件很有用,可以在Docker环境下启动Apache Kafka和Zookeeper。

然后执行,

All services will be brought up!

使用Docker+VS Code搭建Go+Python的开发环境

因为项目需要,可能使用Go调用Python 3的接口,趁这个机会实践了一下,如何用Docker+VS Code迅速地搭建开发环境,真的非常非常非常香!

准备Docker Image和Container

先使用Docker迅速的Build出包含了Go,Python 3.7的Image,同时也下载了DataDog/go-python3。这是一个挺不错的Go Module,可以用来调用Python 3的C API,进而调用Python的API(后续写篇文章介绍一下用法)。

有了Dockerfile,再使用docker build生成Image

Image生成后,就可以启动Container了,

Container的名字叫go_dev, 同时挂载了H:\go_dev/go_dev上。Container里的go, python3都已经安装完成。

使用VSCode连接到Docker container

首先需要安装Remote Container的插件,真的是个神器!

安装完成后,可以在左下角一个新的张铎图标,点击后就可以连接刚才启动的Container了。

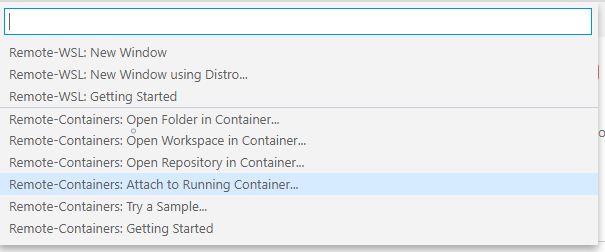
在菜单中选择,“Attach to Running Container

在后面的菜单中,选择Container “go_dev”。第一次连接时,需要选择一个目录来写代码了。连接后,打开Terminal也默认调整在Container里的目录。非常方便!

在Remote模式下,代码的很多分析是在Container里完成的,所以在第一次连接完成后,你需要把一些需要的Plugin再安装一下,比如Go语言的支持,Python的支持等等。这个要根据实际的需要。

好了,开发环境搞定,继续板砖写代码吧!


React+Typescript的那些坑(1)- Tips of using React + Typescript (1)

使用React动态路由时,如何得到路由里的参数呢?比如下面URL里的变量id

结合Typescript,你的React Component需要这样

这样,在Component里就可以访问id变量了。

Build NPM Proxy Server on Nexus OSS 3.21

I had good experience with Nexus OSS 2.x and it was very easy to use. Based on it, the team built up Maven proxy server and Java private repository. The server had been served for many years and it helped team to finish thousands of builds without any problem.

To have better NPM repository support, it’s time to upgrade to a newer version of Nexus. Compared with JFrog’s Artifactory OSS, NPM and Gradle repository support is included in Nexus OSS version already.

Installation

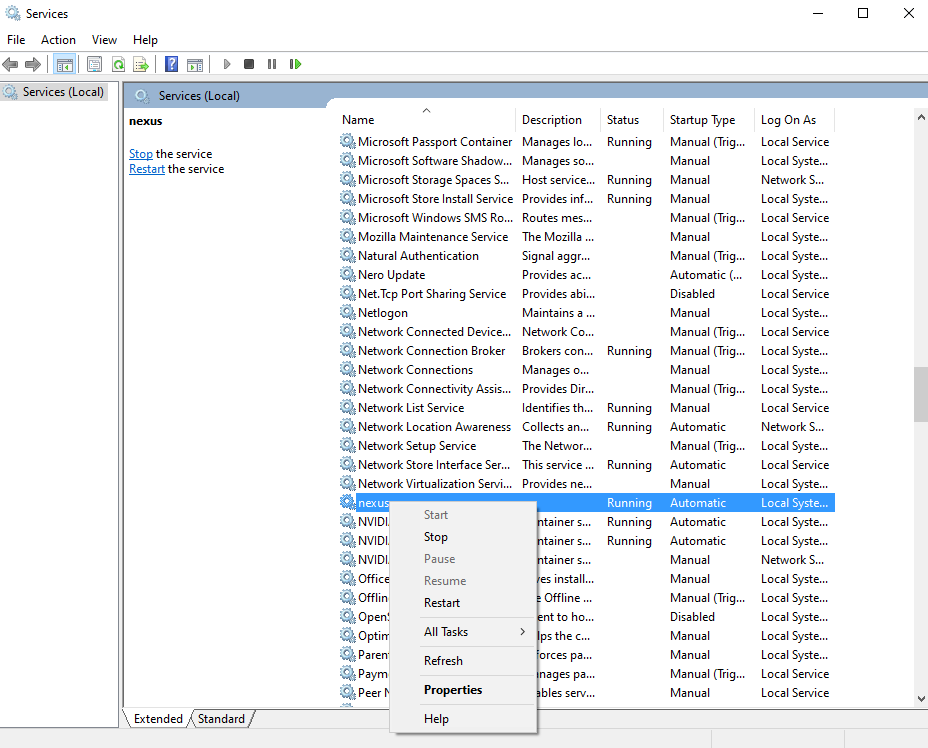
The latest Nexus OSS version can be download from here. Unzip it and go to /bin folder to start it. I am using Windows 10, so Nexus OSS can be installed as a Windows Service. Then you can start/stop the Nexus OSS server in Services Management.

When server starts, you can access the web page, default is http://localhost:8081.

Note: For the first time run, there needs to update the admin user’s password. Follow the instructions to finish it.

Create NPM repository

By default, there are Maven repo (can be used by Gradle as well) and NuGet repo. To have a NPM repo, you need to manually create it.

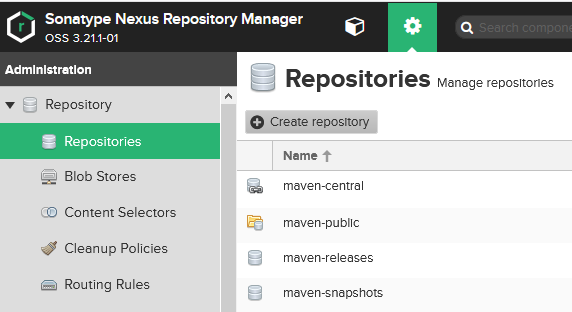
Use “admin” to log into Nexus, Open “Repositories” page and click “Create repository“.

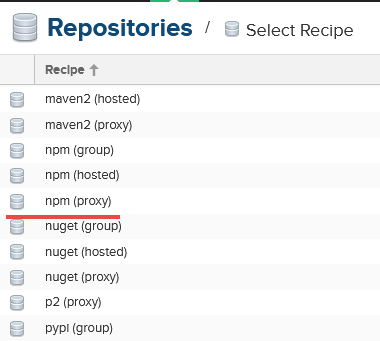
Select “npm proxy” in the Recipe list,

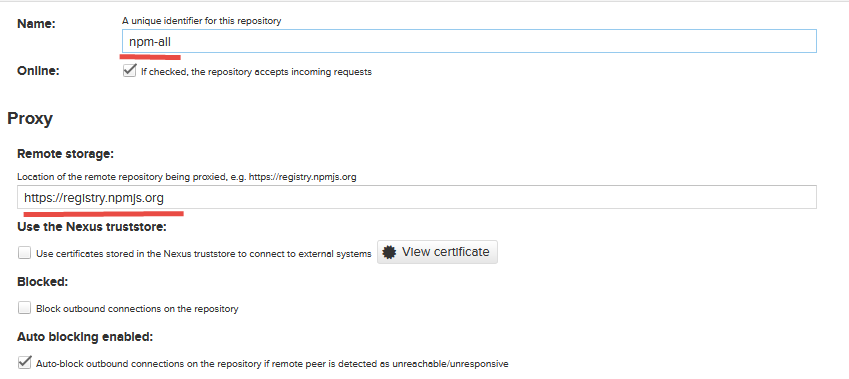
Put a name of the repository, such as “npm-all” and the “remote storage”.

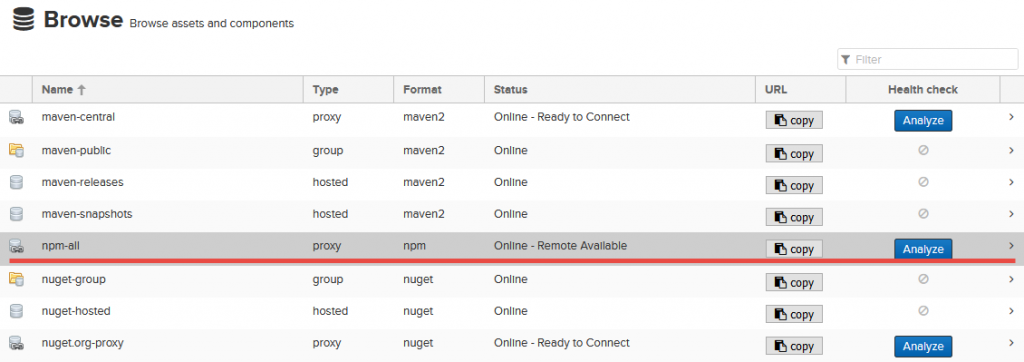
Click “Create repository” to finish the creation. Now a npm proxy server is ready for serving. The repo URL is http://localhost:8081/repository/npm-all/.

NPM and Yarn Configuration

For npm and yarn, you can use the following commands to use this proxy server respectively.

All done!