我是Hadoop小白,写本文是总结笔记,怕之后忘了。
搭个Hadoop Cluster
因为手头有几个Raspberry Pi 3的板子,就花了点时间搭了一个小的Hadoop Cluster的集群,四个Slave with Raspbian, Master server在一个虚拟机里安装了Ubuntu 18.04。关于如何配置,IBM上的这篇Blog讲得非常详细。

NCDC的天气数据
在《Hadoop Definitive Guide》上讲到使用NCDC(National Climatic Data Center)的天气数据来分析每年最高的气温。这本书在Github上有1901年和1902年的数据,但如果你想试试更大的数据集就需要自己下载了。
这里有一个Shell Script可以帮你从NCDC的FTP上下载天气数据。你只需要给出起始和终止年份。
1 2 3 4 5 6 7 8 9 10 11 12 13 14 15 16 17 18 19 20 21 22 23 24 25 26 27 28 29 30 31 32 33 34 35 36 37 38 39 40 41 42 43 44 45 46 47 48 49 50 51 52 53 54 55 56 57 58 59 60 61 62 63 64 65 66 |
#!/usr/bin/env bash # global parameters g_tmp_folder="ncdc_tmp"; g_output_folder="ncdc_data"; g_remote_host="ftp.ncdc.noaa.gov"; g_remote_path="pub/data/noaa"; # $1: folder_path function create_folder { if [ -d "$1" ]; then rm -rf "$1"; fi mkdir "$1" } # $1: year to download function download_data { local source_url="ftp://$g_remote_host/$g_remote_path/$1" wget -r -c -q --no-parent -P "$g_tmp_folder" "$source_url"; } # $1: year to process function process_data { local year="$1" local local_path="$g_tmp_folder/$g_remote_host/$g_remote_path/$year" local tmp_output_file="$g_tmp_folder/$year" for file in $local_path/*; do gunzip -c $file >> "$tmp_output_file" done zipped_file="$g_output_folder/$year.gz" gzip -c "$tmp_output_file" >> "$zipped_file" echo "created file: $zipped_file" rm -rf "$local_path" rm "$tmp_output_file" } # $1 - start year # $2 - finish year function main { local start_year=1901 local finish_year=1920 if [ -n "$1" ]; then start_year=$1 fi if [ -n "$2" ]; then finish_year=$2 fi create_folder $g_tmp_folder create_folder $g_output_folder for year in `seq $start_year $finish_year`; do download_data $year process_data $year done rm -rf "$g_tmp_folder" } main $1 $2 |
下载之后,天气数据会分到不同的zip文件里,但如果上传到HDFS上还要把它放到一个文件里。下面这段Python代码就做这个事情。
|
|
import os import sys if __name__ == '__main__': start_year = int(sys.argv[1]) end_year = int(sys.argv[2]) print('start year {} - end year {}'.format(start_year, end_year)) for i in range(start_year, end_year): os.system('gunzip {}.gz'.format(i)) os.system('cat {} >> ncdc_data.txt'.format(i)) |
要注意的就是,这段代码要运行在天气的Zip同一个文件夹里。
我下载了1901年到1935年的数据,大约400多M,使用hadoop fs的命令上传到HDFS上,
|
|
hadoop fs -put ncdc_data.txt /user/pi/ncdc_new_data.txt |
然后就可以写一个简单的Map – Reduce了。
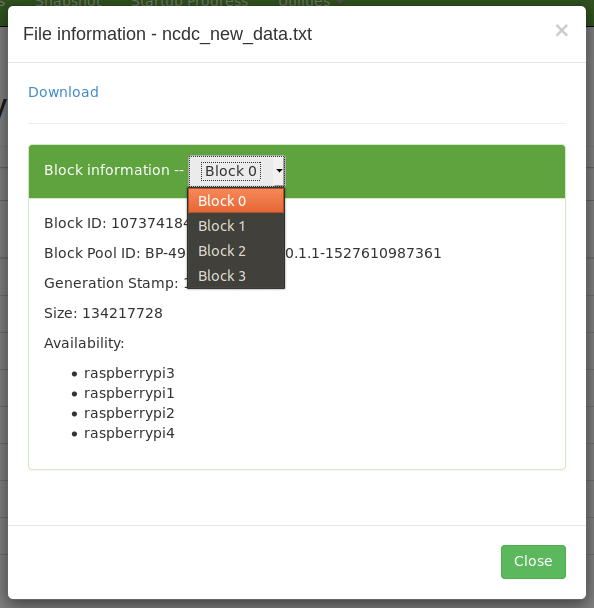
因为HDFS一个Block是128M,所以400M需要4个Block。
Map-Reduce
首先是Mapper,其实就是分析天气文件的每一行,从里面取出温度。
1 2 3 4 5 6 7 8 9 10 11 12 13 14 15 16 17 18 19 20 21 22 23 |
public class MaxTemperatureMapper extends Mapper<LongWritable, Text, Text, IntWritable> { private static final int MISSING = 9999; @Override protected void map(LongWritable key, Text value, Context context) throws IOException, InterruptedException { String line = value.toString(); String year = line.substring(15, 19); int airTemperature; if (line.charAt(87) == '+') { airTemperature = Integer.parseInt(line.substring(88, 92)); } else { airTemperature = Integer.parseInt(line.substring(87, 92)); } String quality = line.substring(92, 93); if (airTemperature != MISSING && quality.matches("[01459]")) { context.write(new Text(year), new IntWritable(airTemperature)); } } } |
Reducer则是从前面得到的年份和温度的信息汇总在一些,求出当年里最高的气温。
|
|
public class MaxTemperatureReducer extends Reducer<Text, IntWritable, Text, IntWritable> { @Override protected void reduce(Text key, Iterable<IntWritable> values, Context context) throws IOException, InterruptedException { int maxValue = Integer.MIN_VALUE; for (IntWritable value : values) { maxValue = Math.max(maxValue, value.get()); } context.write(key, new IntWritable(maxValue)); } } |
这个过程很像Java 8里引入的Stream。
之后,还要实现一个Job来执行这个Map-Reduce任务。
1 2 3 4 5 6 7 8 9 10 11 12 13 14 15 16 17 18 19 20 21 22 23 24 25 |
public class MaxTemperature { public static void main(String[] args) throws Exception { if (args.length != 2) { System.err.println("Usage: MaxTemperature <input path> <output path>"); System.exit(-1); } Job job = Job.getInstance(); job.setJarByClass(MaxTemperature.class); job.setJobName("Max temperature"); FileInputFormat.addInputPath(job, new Path(args[0])); FileOutputFormat.setOutputPath(job, new Path(args[1])); job.setMapperClass(MaxTemperatureMapper.class); job.setReducerClass(MaxTemperatureReducer.class); job.setOutputKeyClass(Text.class); job.setOutputValueClass(IntWritable.class); System.exit(job.waitForCompletion(true) ? 0 : 1); } } |
这个程序需要两个路径,一是NCDC的数据文件,一是结果的输出路径。Job还要需要明确Mapper和Recuder的类名。
生成Jar文件后,使用下面的命令行运行Map-Reduce任务
|
|
hadoop jar /home/yli/IdeaProjects/LearnHadoopBook/out/artifacts/max_temparature/max_temparature.jar /user/pi/ncdc_new_data.txt /user/pi/output4 |
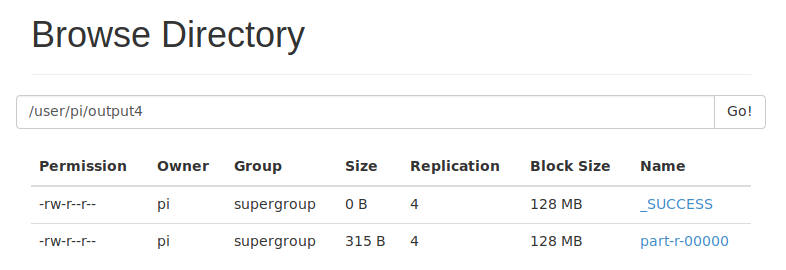
结果会被发到output4文件夹里,几分钟后,就可以看到结果了。
1 2 3 4 5 6 7 8 9 10 11 12 13 14 15 16 17 18 19 20 21 22 23 24 25 26 27 28 29 30 31 32 33 34 35 |
1901 317 1902 244 1903 289 1904 256 1905 283 1906 294 1907 283 1908 289 1909 278 1910 294 1911 306 1912 322 1913 300 1914 333 1915 294 1916 278 1917 317 1918 322 1919 378 1920 294 1921 283 1922 278 1923 294 1924 294 1925 317 1926 489 1927 300 1928 378 1929 328 1930 400 1931 461 1932 489 1933 489 1934 478 1935 478 |
好了,Hadoop里的HelloWorld算是完成了!
References